Essential DIY Home Inspection Guide
A DIY pre-listing inspection is a seller-led walkthrough that identifies visible maintenance, safety, and cosmetic issues before a buyer’s inspector arrives. Performing this inspection reduces surprises, strengthens disclosure documents, and often improves sale outcomes by addressing common objections before they arise. This guide covers practical exterior checks, interior zones, home systems (plumbing, electrical, HVAC), safety and structural red flags, repair prioritization and ROI, plus day-of-listing preparation and documentation. You’ll learn what to test visually, which minor fixes deliver the most value, when to escalate to a licensed pro, and how to document findings for buyers. Read on for step-by-step checklists, quick DIY fixes, decision tables to guide hire-versus-DIY choices, and targeted advice for Sarasota and Florida sellers where storms and humidity affect priorities.
What Are the Essential Exterior Checks in a DIY Home Inspection?
An exterior pre-listing inspection focuses on visible building envelope elements that most frequently affect buyer perception and long-term durability. Walk the perimeter to assess roof condition, gutters and drainage, siding and paint, foundation lines, windows and doors, and landscaping that affects grading and moisture control. These checks prevent water intrusion, reveal storm damage common in Florida, and improve curb appeal—yielding faster offers and fewer inspection contingencies. Start with a systematic exterior sweep from curb to roofline, documenting issues with photos and notes to create a prioritized repair list for buyers and listing disclosures.
This exterior checklist highlights the highest-value visual checks sellers can perform before listing.
- Inspect the roof for missing, curled, or damaged shingles, and check the flashing around penetrations.
- Verify that gutters and downspouts are clear and that water is directed at least 5–10 feet from the foundation.
- Look for foundation cracks, uneven grading, and soil piled against siding or trim.
- Test window and door seals, broken panes, and damaged weatherstripping; operate locks.
- Check exterior paint and siding for rot, blistering, or separated trim.
- Evaluate walkways, driveways, and steps for trip hazards and visible cracking.
- Trim landscaping away from the house, remove debris, and note standing water or poor drainage.
- Assess hurricane-readiness: loose shutters, unsecured outdoor fixtures, or damaged roof elements.
A focused exterior sweep like this prevents easy objections and directs repair dollars to the items buyers see first, which leads into how to assess the roof in more detail.
How to Assess Roof Condition and Identify Common Issues
A practical roof assessment begins on the ground with binoculars and continues with a safe ladder inspection, where appropriate; always prioritize safety and avoid walking on steep or fragile roofs. Look for missing, cracked, or curling shingles; moss or algae growth; sagging sections; and compromised flashing around chimneys, vents, and skylights. Document roof age and any patched areas with photos, and note active leaks inside ceilings or attic spaces as confirmation of through-roof failures. If you see widespread shingle loss, significant sagging, or water stains inside, capture clear images and consider a professional roofer for an estimate and a written condition statement for buyers.
Recording roof findings helps buyers and agents understand the urgency, and that documentation naturally leads to checking foundation, drainage, and landscaping, which are the following priorities.
What to Look for in Foundation, Drainage, and Landscaping Before Selling
Foundation and drainage issues often drive major buyer concerns, so identify hairline versus structural cracks and monitor displacement, stair-step cracks, or wide separations that indicate movement. Ensure soil slopes away from the foundation—aim for a 5% slope over the first 10 feet—and install or extend downspouts to move water away from the house. Landscaping adjustments, such as removing large shrubs near the foundation, mulching away from siding, and repairing grading or retaining walls, both reduce moisture risk and improve curb appeal. Small grading changes and gutter extensions are low-cost fixes that mitigate water intrusion and demonstrate responsible maintenance to prospective buyers.
Understanding subsurface behavior and visible evidence of movement sets the stage for interior checks where water stains or settling first appear.
Which Interior Rooms First?
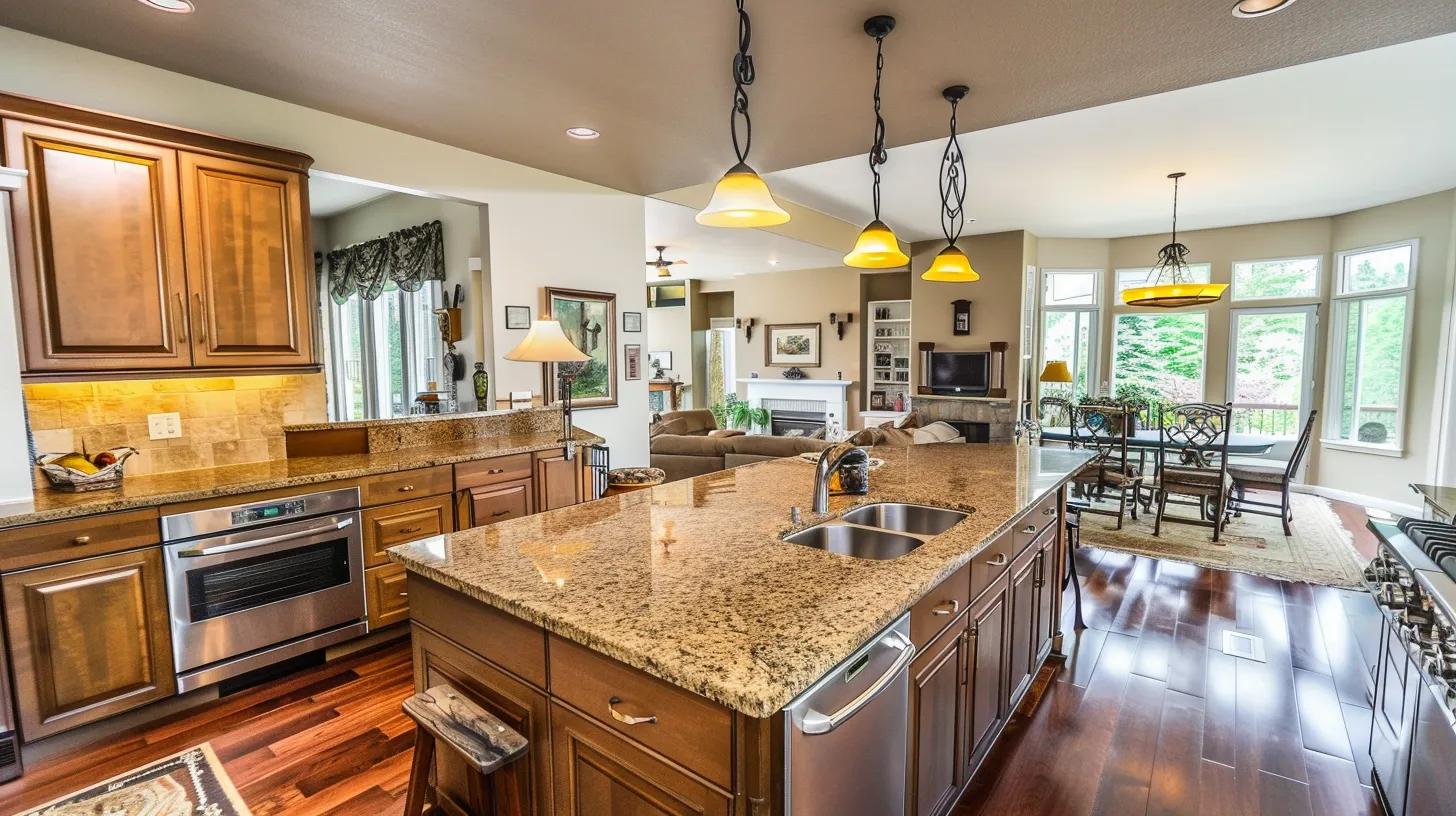
An interior pre-listing inspection identifies visible defects in living spaces, kitchens, bathrooms, and utility zones that commonly influence buyer decisions. Walk through every room, testing doors and windows, scanning walls and ceilings for stains or cracks, assessing the condition of the flooring, and operating built-in appliances and fixtures. Focus on kitchen and bathroom plumbing visible under sinks, tile grout and caulk, and appliance functionality that can be repaired quickly. Create a room-by-room inventory of findings with photos and simple fixes listed to streamline disclosures and speed negotiations.
Key interior zones and one-line what-to-check items:
- Walls and ceilings: check for water stains, hairline cracks, and fresh paint touch-ups that may hide issues.
- Floors and thresholds: look for unevenness, soft spots, and damaged transitions that may indicate structural or moisture issues.
- Doors and windows: test opening/closing, locks, and weatherstripping for sealing gaps and operation.
- Kitchens and bathrooms: inspect under-sink plumbing, caulking around tubs/showers, and appliance startup behavior.
- Attic, basement, crawlspace: check for insulation, signs of pests, moisture, and easy mechanical access.
- Mechanical rooms: ensure accessible panels, labeled breakers, and no visible leaks on water heaters or HVAC.
This room-by-room focus reveals actionable repairs and leads naturally to how to perform checks on walls, ceilings, floors, doors, and windows.
How to Check Walls, Ceilings, Floors, Doors, and Windows for Defects
Start a systematic interior walkthrough: inspect each wall and ceiling for discoloration, bulging, or peeling paint, and trace stains toward potential sources such as plumbing or roof leaks. Use a level or an app-level to test floors and door frames for movement and note any sticking doors or misaligned windows that indicate settling or humidity-related swelling. For windows, compress weatherstripping and operate latches to confirm seals and ease of use; replace cracked panes or broken seals that cause fogging. Photograph issues and make a short note of likely causes to help decide DIY fixes (re-caulking, hinge tightening) versus professional work (re-framing, structural repair).
Documenting cosmetic fixes and functional tests in this way prepares you for hidden-space checks, such as the attic, basement, and crawlspace, where many root causes originate.
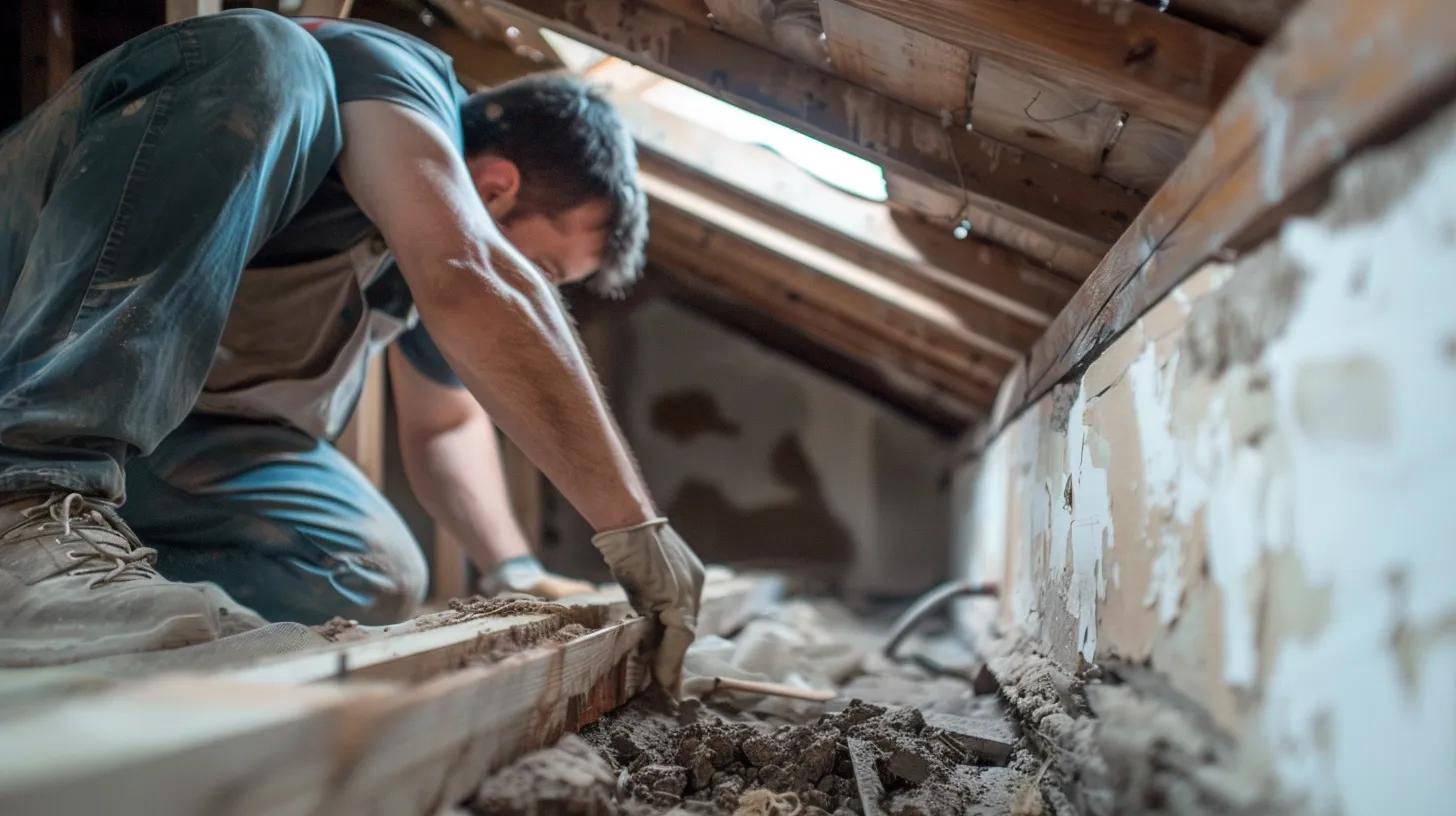
What to Inspect in Attic, Basement, and Crawlspace for Potential Issues
When accessing attics, basements, and crawlspaces, observe safety first—use proper lighting, protective gear, and ensure stable footing—then check insulation levels, ventilation, and roof sheathing for active leaks. Look for rodent droppings, water stains, mold patches, and sagging or rotted joists that indicate structural or moisture problems; photograph any suspect areas for later evaluation. Verify that HVAC ducts and wiring are intact and that sump pumps or drainage fabric in basements function as intended; document signs of old versus recent water intrusion. If you encounter mold growth, extensive rot, or significant structural deformation, note that these are escalation points for professional assessment and move to capture repair estimates.
Identifying hidden moisture or structural concerns in these spaces requires a systems-level inspection of plumbing, electrical, and HVAC systems that sellers should perform next.
How to Conduct a Thorough Home Systems Inspection Yourself?
A systems inspection targets plumbing, electrical, HVAC, and large appliances to verify safe operation and to reveal everyday pre-listing items that buyers will test. Use visual checks and simple functional tests—run multiple fixtures, trip GFCIs, check breaker operation, and run the HVAC through a heating/cooling cycle while listening for unusual noises. Document ages, service records, and any visible corrosion or leakage; this information both guides repairs and builds buyer confidence when disclosed. A concise systems table below helps you decide between DIY checks and professional services for common symptoms.
Use this table to guide DIY actions and recognize when to hire a licensed contractor.
This decision table clarifies symptom severity and points directly to the plumbing-specific checks sellers should prioritize before listing.
What Plumbing Problems Should Sellers Identify and Fix Before Listing?
Common pre-listing plumbing issues include leaking faucets, running toilets, slow drains, and water heater concerns—each of which buyers will test during a walkthrough. Check under sinks for dampness, inspect exposed supply lines and shutoff valves for corrosion, run all drains to detect slow flow, and flush toilets to confirm fill and flush operation. Examine the water heater area for pooling, rust, or sloppy venting, and note the unit age for buyer disclosures. Minor fixes like replacing anemic washers, tightening loose connections, and applying fresh caulk around tubs are cost-effective. When you document these checks and simple repairs, buyers feel reassured, and you reduce negotiation friction over perceived unknowns.
A focused plumbing sweep introduces parallel checks of electrical and HVAC systems with simple tests and documentation, helping minimize surprises.
How to Evaluate Electrical and HVAC Systems for Safety and Functionality
Electrical safety checks begin with testing outlets and GFCIs, ensuring visible wiring is secured, and that the central panel is accessible and labeled. Audible buzzing, burning odors, or repeated tripping require immediate professional attention. For HVAC, change or clean filters, run the system through both heating and cooling cycles, and listen for rattles or grinding that suggest failing motors or bearings; confirm condensate lines are precise and outdoor units are free of debris. Keep a log of unit ages and recent service dates to include in disclosure materials; good documentation often answers buyer questions and can increase perceived value when system deficiencies exceed basic cleaning or filter replacement. Secure licensed trades to provide estimates and receipts for disclosure.
This systems-level inspection points directly to prioritizing repairs with the highest return and guides decisions about when to hire professionals.
DIY Home Inspection: Vital Checks for Morgando Realty ServicesWhat Safety Features and Structural Concerns Must Be Checked in a DIY Inspection
Safety-critical features and structural red flags affect both habitability and saleability, so verify detectors, stair safety, railings, and visible signs of structural movement. Test smoke and carbon monoxide detectors, confirm handrails are secure, and inspect stairs and exterior steps for trip hazards. Identify urgent structural indicators such as significant foundation shifts, severe sagging, or bowing walls; these require immediate professional evaluation. Clear documentation of working safety devices and identified hazards reduces buyer uncertainty and helps prioritize which items must be fixed before listing or be disclosed transparently.
Below is a yes/no style checklist to help you quickly record safety items and next steps.
- Are all smoke detectors present and testing successfully? If not, replace or service them.
- Are carbon monoxide detectors installed where required and functioning? If not, replace batteries or units.
- Are railings and stair treads secure with no loose or missing elements? If not, secure or repair immediately.
- Are there visible structural signs (large cracks, sagging floors, bowing walls)? If yes, document and seek an engineer.
- Is there noticeable mold, extensive rot, or active water intrusion? If yes, isolate the area and call a remediation or structural pro.
These immediate safety checks prepare you for the detector testing protocol and for identifying structural issues that demand professional attention.
How to Test Smoke and Carbon Monoxide Detectors Effectively
Testing detectors involves both a functional button test and a documented battery/service schedule: press each unit’s test button to confirm alarm sound and response, replace batteries annually or when low-battery chirps occur, and note installation or replacement dates for disclosure. Ensure smoke detectors are located on each level and outside sleeping areas, and that carbon monoxide detectors are placed near sleeping zones and mechanical rooms, as applicable. For hardwired systems, verify battery backup function during your tests and record the system status with time-stamped photos or video to include with your listing packet. Demonstrating tested, functioning safety devices reassures buyers and reduces contention over inspections related to code or safety concerns.
Confirming detectors and safety devices helps identify structural hazards that require monitoring or urgent repair.
What Structural Issues and Hazards Should Sellers Watch For?
Sellers should differentiate monitorable issues from urgent hazards: hairline foundation cracks, minor settling, and small plaster cracks are often cosmetic and monitored, whereas sagging beams, large foundation displacement, or bowing walls indicate structural compromise requiring an engineer. Look for doors that stick due to frame movement, sloping floors over a wide area, or visible separation at wall-to-floor junctions; photograph these and include measurements or a visible scale to document severity. For urgent structural signs, obtain a professional evaluation and a written report to present to buyers; for monitorable items, schedule repairs or plan disclosures that explain the observations and any planned remediation. Clear documentation of severity and planned actions reduces buyer uncertainty and can preserve sale value.
A prioritized repair strategy helps allocate resources efficiently. The following topics are: which repairs offer the best ROI, and when to hire professionals.
Which Repairs Offer the Best ROI and When Should Sellers Hire Professionals?

Sellers gain the most from high-impact, low-cost repairs that improve perceived value: fresh paint, minor plumbing and electrical fixes, hardware and fixture updates, and landscaping improvements. Prioritize tasks that address inspection-item surprises first, then cosmetic enhancements that affect photographs and first impressions. When in doubt about safety or code—electrical rewiring, structural repairs, primary roof replacement, or mold remediation—hire licensed professionals and obtain written estimates and receipts to include in disclosures. Below is a comparison table to help prioritize common repair targets by typical DIY fix, cost range, and ROI potential.
Use this table to compare targeted repairs and decide which to tackle yourself and which to hire a professional for.
This comparison shows that cosmetic updates and minor system tune-ups usually offer the best immediate ROI. At the same time, structural or system-critical work often requires pros and can be costlier with variable direct ROI.
What Are High-Impact DIY Repairs to Boost Home Value Before Selling?
High-impact DIY projects deliver visible results without high cost: freshening interior paint, replacing dated light fixtures and cabinet hardware, re-caulking tubs and sinks, and power-washing or edging exterior spaces all raise buyer perception. These tasks are straightforward: choose neutral paint, install modern yet budget-friendly fixtures, and replace worn weatherstripping to improve energy efficiency. Estimate time and cost conservatively—most small jobs can be completed in a weekend and provide an outsized visual lift for listing photos and open houses. Carefully document expenses and before/after photos to include with your disclosures, which help justify the asking price and demonstrate proactive maintenance.
Selecting which DIY repairs to prioritize naturally helps determine when a job is too complex and warrants a professional.
When Is It Better to Call a Professional Instead of DIY?
Call a licensed professional when work involves safety, code compliance, or requires permits—examples include electrical panel changes, primary roof replacement, structural foundation repairs, mold remediation, and extensive HVAC servicing. Use these practical thresholds: if the fix affects structural integrity, concealed systems, or requires permits, get multiple quotes and proof of licensing and insurance before proceeding. Vet contractors by requesting references, written estimates, and timelines; retain invoices and warranties to present to buyers. When you follow these criteria, you avoid liability, ensure compliance, and often save time and negotiation headaches at closing because buyers receive documented professional repairs.
After prioritizing repairs and vetting contractors, prepare the home and documentation for listing day—practical logistics are the next focus.
How to Prepare Your Home on Listing Day for a Successful Inspection?
Day-of-listing preparation reduces friction during buyer inspections and demonstrates transparency; focus on decluttering, cleaning, ensuring access to mechanical areas, and organizing records. Create a folder containing service records, receipts, permits, and photos from your pre-listing inspection to hand to agents or buyers; label keys and provide simple operation notes for each system. Keep pathways clear, mechanical rooms accessible, and ensure utilities are on for functional tests. These practical steps help inspections proceed smoothly and often shorten negotiation cycles.
The following checklist lists practical, actionable tasks to prepare your home for inspectors and buyers.
- Clear clutter from entryways, mechanical rooms, and attic/basement access points so inspectors can perform thorough checks.
- Deep-clean kitchens and bathrooms, replace torn shower curtains, and touch up grout or caulk to avoid cosmetic objections.
- Label switches, thermostats, and breaker panel circuits, and place keys or access instructions for locked areas in a visible folder.
- Lay out service records, receipts, warranties, and photographs from your pre-listing inspection for immediate access by the reviewer.
- Ensure pets are secured and that any outdoor gates are unlocked to allow the inspector movement.
A prepared, accessible home reduces inspection time and increases buyer confidence, and that practical readiness ties to how best to declutter, clean, and make the property inspector-ready.
What Are the Best Practices for Decluttering, Cleaning, and Accessibility?
Effective decluttering and cleaning focus on making spaces appear larger, neutral, and easy to inspect: remove personal items from counters, minimize furniture to improve flow, and store excess belongings offsite if possible. Clean high-touch, high-visibility areas—kitchen surfaces, bathroom fixtures, and entryways—and repair or replace worn doorknobs, switch plates, and torn screens to avoid trivial objections. Label storage and mechanical areas and provide a succinct access sheet listing locations of shutoffs, panels, and essential appliance instructions. Presenting a tidy, organized home helps inspectors work efficiently and reassures buyers, which naturally leads to how a DIY checklist empowers local sellers.
These accessibility practices make inspections straightforward and set the stage for leveraging local support and resources if desired.
How Does Using a DIY Home Inspection Checklist Empower Sarasota Sellers?
A structured DIY checklist empowers Sarasota sellers by addressing local climate and market specifics—such as humidity-driven mold risk, hurricane-related roof and shutter readiness, and coastal corrosion concerns—so sellers can mitigate region-specific buyer objections before listing. Being proactive with documentation and targeted fixes often accelerates negotiations and reduces inspection-related concessions, because buyers see a seller who understands local vulnerabilities and has acted to mitigate them. For sellers who prefer extra guidance, Morgando Realty Services offers a Do It Yourself Assistance resource that provides local insights, priority checklists, and coordination tips for arranging inspector access and repair estimates; this optional support helps sellers decide which repairs to DIY and when to involve licensed contractors.
Using a checklist tailored to local conditions both reduces surprises and strengthens buyer trust at every stage of the sale process.

Gina Morgando is a licensed Broker & Realtor serving Sarasota, Manatee, and Palm Beach Counties. With over 10 years of experience, she helps buyers, sellers, and investors make confident real estate decisions across Florida.